Hi everyone! Welcome again to roadtodroid for another fun Android tutorial. In this post I am gonna tech you how to create your own customized list views. Along the way some new things such the vibrator class and the action bar methods are also introduced. So let's start building this fun app.
1. Create a new Android Application Project
- Go to File > New > Android Application Project.
- Give a suitable name and proceed as before.
 |
| New app dialog |
2. Add a ListView to activity_main.xml
- From the palette, go to the composite tab and select a ListView from there. Place it inside the graphical layout in activty_main.xml.
- Remember to make the android:id="@android:id./list".
 |
| activity_main.xml |
3. Create a rowlayout.xml file
- In the Package Explorer, under you app folder, add a new rowlayout.xml to res/ layout folder (where activity_main.xml is present).
- To do this right-click on layout folder and go to new and select Android XML File.
- In the rowlayout.xml file add the following code, to add an image and text to our list adapter.
4. Create the Custom Adapter MyCustomAdapter.java
- Now its' time to define the view of the list according to our needs. So go to the src folder under our project name in the package present right-click and add a new Class to it.
- For now just copy the code below and change the package name to your's package name. For more explanation check the bottom of the post.
 |
| Adding new Custom Adapter Class |
5. Code the MainActivity.java
- In our main java file we first make our main class extend ListActivity to get all list handling functionality.
- Then we made an object of our Custom Adapter and sent the values to it.
- Finally we set the Custom Adapter to our list.
- Also onListItemClick is also used to do some processing when the list item is clicked.
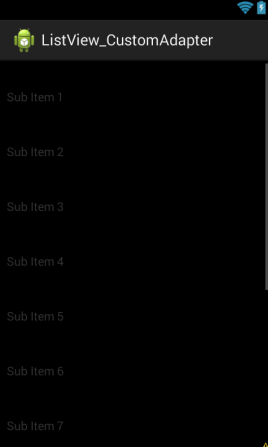
6. Run the app
 |
| Launch page |
 |
| Search for list item |
Code Explained:
- Our main goal in this activity is to group an image and text in the same list area. To do this our normal ArrayAdapter will not do as it only contains only in type of object . So in our Custom Adapter (which basically extends ArrayAdapter to get the text data) we create a new class ViewHolder to encapsulate image & text. MyCustomAdapter class has a constructor which receives the list of sites in our case, and store it in a local variable.
- If the getView() method is not there in your class add it by -> Right-click > Source > Override/implement Methods.
- Now in the getView() method we first create a View object 'myview' and set it to convertView. This is basically an optimization step using which we save the inflating of the view on very redraw (or scroll ) of the list. If initially convertView is null (which it will be), a new layout inflator is inflated and attached to our view using the setTag() method.
- After this the string from the local variable is added to our viewHolder using <Holder name>.<Text Object>.setText(String).
- Then the corresponding images are loaded from the res/drawable-hdpi folder.
- Now in the main activity we create an object of MyCustomAdapter , sending it the String[], and setting it to our ListView.
- getActionBar().hide() is used in onCreate() to hide the action bar at the top so as to get more screen space (Requires android:minSdkVersion="11" in AndroidManifest.xml).
- Also a Vibrator object is created in onListItemClick() to make the device vibrate on item click.To be able to use this service do the following:
- import android.os.Vibrator;
- In the AndroidManifest.xml file add
<uses-permission android:name="android.permission.VIBRATE"/>
Download Code:
Hi there, I am Shobhit Chittora. I am a college student and like to develop apps for Android platform.I started this blog to share my experiences with Android development and may be help you guys on the “roadtodroid”.


0 comments:
Post a Comment