Welcome again to road to droid. In this section I am going to discuss about the the ways to implement a SQLite database on you android device. To demonstrate the concept I am creating an app which makes user fill a form and then inserts the details into a database. So hop in for a ride!
1. Create a new Android Application Project
- Go to File > New > Android Application Project.
- Fill in the name for the app as you like and click Next.
- In the next few dialogs click Next and in the one with Activity Types select Empty Activity.
- In the final dialog box click Finish.
 |
| Enter a name for the app |
2. Add elements to the activity_main.xml file
- In the activity_main.xml file (name may be different in case you named your main activity differently), add two EditTexts & one Button. (I have also added two ImageViews for the Mail & Password fields, you may omit them).
- Insert a android:hint field to give hints on what to enter in the EditTexts.
 |
| Graphical Layout |
3. Add a DbHelper class to the package
- Right Click on the package under the src folder in your apps Package Explorer and add a new Class to it.
- This class extends SQLiteOpenHelper which encapsulates all methods for creating and managing SQLite database in android.
- For more explanation go to the end of the post to the Code Explained section.
 |
| My_DbHelper class creation |
4. Code away the MainActivity.java
- In our main activity we first create an object of My_DbHelper to handle database operations.
- In onCreate() we bind the layout elements to variables and in the onClickListner of the button we check if the EditTexts are empty by using .getText().toString().equalsIgnoreCase("").
- If the both the fields are not empty then we check if there is a Admin login attempt with "r2d" as both mail id and password . If so we empty the EditTexts (using setText()) and launch an Intent to another activity which we will create below.
- We also check for the validity of the email id entered using a regular expression. The .match(regex) method returns true if there is match.
5. Add an Admin login portal for the next tutorial
- Add another Android activity to the package by right clicking it and selecting New > Other > Android Activity.
- The implementation of this activity is same as that demonstrated in previous posts on List Views.The only difference is in the show_in_list() method which uses an object of My_DbHelper to get all users in the database using the method we created (get_all_user()).
6. Enter GridView to xml of Admin login activity
- In the xml file of this new activity add a grid view to show the entries of the database.
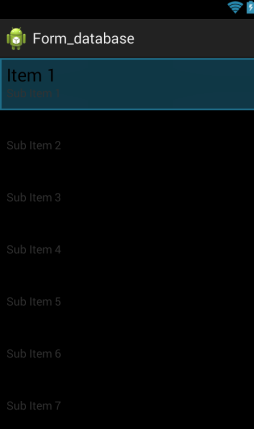 |
| Grid View |
7. Run the App
- Launch the app on an AVD or on a physical device by pressing CTRL + F11.
Code Explained:
- In the My_DbHelper class which extends a SQLiteOpenHelper to manage database creation and version management. For more on SQLiteOpenHelper go to http://developer.android.com/reference/android/database/sqlite/SQLiteOpenHelper.html.
- In the class the DATABASE_VERSION variable is used if we have several versions or instances of our database.We can change the version at any time or save any version for future use.For assign any number to this variable.
- The String variables DATABASE_NAME & TABLE_NAME are used to give a name to our database and to a table in it. You can have more than one tables in your database. Create a new String to store each ones name.
- Now we create a String query to create a new table.We define three attributes for any tuple. One is 'user_id' which is of type INTEGER and is set to AUTOINCREMENT, also it is the PRIMARY KEY for the table. Another attribute is 'mail_id' which is of type TEXT and is set to NOT NULL. The is the case for the attribute 'pass'.
- In the onCreate() method of the class we create the table using execSQL() method.
- In the onUpgrade() method we can either load an older version of the database or just drop everything and create a new one. And that is what we have done here.
- We have also created two methods to insert tuples into the table & to retrieve tuples from the table.
- The insert_user(String ,String) method takes as argument two strings and inserts them into the table using a ContentValues object. First we get a SQLiteDatabase object for our table in the writable mode using getWritableDatabase() method.
- We create a new ContentValues object and put in it the Strings m & p with the respective attribute names for the table. Note we didn't put the user_id in values as it is set to AUTOINCREMENT. Finally we insert the values into the table using insert() method.
- In the get_all_user method we first define a List ro store all the tuples in the database in string form. Then we create the search query which is SELECT * FORM TABLE_NAME.
- Now we get a SQLiteDatabase object which is only readable using getReadableDatabase() method. We then create a cursor to move around in our table. A cursor is just like a pointer to the tuples in the table.
- We move this cursor forward into the table using moveToNext() on cursor object. We first also make sure if the cursor is at the starting of the table by calling moveToFirst() on cursor, Finally we go in a loop to get user_id, mail_id & pass from the cursor using getString()/getInt() & getColumnIndex() methods. We add each of these values to out List object.
- Finally we return the List to the calling Activity.
Download Code:

Hi there, I am Shobhit Chittora. I am a college student and like to develop apps for Android platform.I started this blog to share my experiences with Android development and may be help you guys on the “roadtodroid”.


0 comments:
Post a Comment